WLAN
Applications
Access Role: Wireless
LANs are deployed in an access layer role, meaning that they are used as an
entry point into a wired network. In the past, access has been defined as
dial-up, ADSL, cable, cellular, Ethernet, Token Ring, Frame Relay, ATM, etc.
Wireless is simply another method for users to access the network. Wireless
LANs are Data-Link layer networks like all of the access methods.

Network
Extension: Wireless networks can serve as an extension to a wired
network. There may be cases where extending the network would require
installing additional cabling that is cost prohibitive. You may discover that
hiring cable installers and electricians to build out a new section of office
space for the network is going to cost tens of thousands of dollars. In the case of a large warehouse, the distances
may be too great to use Category 5. Fiber might have to be installed, requiring
an even greater investment of time and resources. Installing fiber might
involve upgrades to existing edge switches.

Building-to-Building Connectivity (Point to Point):
In a campus environment or an environment with as few as two
adjacent buildings, there may be a need to have the network users in each of
the different buildings have direct access to the same computer network. In the
past, this type of access and connectivity would be accomplished by running
cables underground from one building to another or by renting expensive
leased-lines from a local telephone company. Using wireless LAN technology,
equipment can be installed easily and quickly to allow two or more buildings to
be part of the same network without the expense of leased lines or the need to
dig up the ground between buildings. There are two different types of
building-to-building connectivity. The first is called point-to-point (PTP),
and the second is called point-to-multipoint (PTMP). Point-to-point links are
wireless connections between only two buildings.

Building-to-Building Connectivity (Point to Multipoint):

Last Mile Data Delivery: Wireless
Internet Service Providers (WISPs) are now taking advantage of recent
advancements in wireless technology to offer last mile data delivery service to
their customers. "Last mile" refers to the communication
infrastructure—wired or wireless that exists between the central office of the
telecommunications company (telco) or cable company and the end user.

Service Sets
A service set is a term used to describe the basic
components of a fully operational wireless LAN. There are three ways to
configure a wireless LAN, and each way requires a different set of hardware.
The three ways to configure a wireless LAN are:
- Independent Basic Service Set (IBSS)
- Basic Service Set (BSS)
- Extended Service Set (ESS)
Independent Basic Service Set (IBSS):
An independent basic service set is also known as an ad
hoc network. An IBSS has no access point or any other access to a
distribution system, but covers one single cell and has one SSID. The clients
in an IBSS alternate the responsibility of sending beacons since there is no
access point to perform this task. In order to transmit data outside an
IBSS, one of the clients in the IBSS must be acting as a gateway, or router,
using a software solution for this purpose. In an IBSS, clients make direct
connections to each other when transmitting data, and for this reason, an IBSS
is often referred to as a peer-to-peer network.

Basic Service Set (BSS):
When one access point is connected to a wired network and a
set of wireless stations, the network configuration is referred to as a basic
service set (BSS). A basic service set consists of only one access point and
one or more wireless clients.
A basic service set uses infrastructure mode - a mode
that requires use of an access point and in which all of the wireless traffic
traverses the access point. No direct client-to-client transmissions are
allowed.
Each wireless client must use the access point to communicate
with any other wireless client or any wired host on the network. The BSS covers
a single cell, or RF area, around the access.

Extended Service Set (ESS):
An extended service set is defined as two or more basic
service sets connected by a common distribution system. The distribution system
can be either wired, wireless, LAN, WAN, or any other method of network
connectivity. An ESS must have at least 2 access points operating in
infrastructure mode. Similar to a BSS, all packets in an ESS must go through
one of the access points.

Roaming: Roaming is the process or ability of a
wireless client to move seamlessly from one cell (or BSS) to another without
losing network connectivity. Access points hand the client off from one to
another in a way that is invisible to the client, ensuring unbroken
connectivity. When any area in the building is within reception range of more
than one access point, the cells’ coverage overlaps. Overlapping coverage areas
are an important attribute of the wireless LAN setup, because it enables
seamless roaming between overlapping cells. Roaming allows mobile users with
portable stations to move freely between
overlapping cells, constantly maintaining their network connection. Note: when roaming, we perform 15% to 20% overlapping.


Overlapping:
On co-location overlapping occure, to avoid ovelapping we must change the
channels.

IBSS
Lab1_Software
based Bridge:
Step1: On PC1 >
network and sharing center > manage wireless network > click on Add
button (to create folder for WLAN profile for Ad-hoc mode) > click on Ad-hoc
network > next > network name (SSID): Ad-hoc-test, security type: wep,
security key: 123abc > next > next > close.
Step2: On PC2,
PC3, and PC4 > Right click on network icon on task bar > now connect to
Ad-hoc-test > give password > ok.
Step3: On PC1 >
open network and sharing center > change adapter settings > merge both
Local area connection and wireless network connection > select both >
right click > Bridge connections > ok > right click on wireless
network connection > properties > give IP, Gateway and DNS if not get
> ok.
Now we created software based Bridge from PC1, and when PC2,
PC3, PC4 wants to access Internet it will success.

Lab2_Internet
connection sharing (in Ad-hoc mode):
Small office and home office, we can use ICS in ad-hoc mode.
In windows ICS is the process of sharing a single Internet connection (DSL)
between multiple users. A number of technologies use involved in ICS. For
example: NAT, Baby DHCP, Basic Firewall, Cash DNS, Proxy server.
On wired
network:
Step1: Install two
link cards on ICS Server, and configure the link card which is connected to
DSL.
Step2: Right click
on the NIC which is connected to DSL > properties > sharing > check
Allow other network users to connect through this computer Internet connection
> ok > setting > Allow FTP, Telnet, etc.
Note: when we share Internet connection through ICS, the IP
address format will be 192.168.137.any.
ICS on wired network:

ICS on wireless network:

Or:

BSS
Lab3_Creating
a simple wireless network (single AP):
Step1: Connect to
AP using web interface (every AP have builtin web server for configuration)
> Internet explorer > http://192.168.1.1 > enter
> username: admin, password: admin > enter.
Step2: Network
> change IP address here (give any IP) > Wireless settings > basic
settin > SSID: test, Region: Afghanistan, Channel: 11, Mode: 54Mbps
(802.11g) > save.
Note: if we have same vendor equipements select propritary
speeds mode.

ESS
Lab4_Creating
two AP with roaming:
Step1: Connect to
AP1 through web browser > http://192.168.1.1 > enter
> username: admin, password: admin > ok.
Step2: Network tab
> change IP address > save > Wireless tab > Basic settings >
SSID: ccna, Region: Afghanistan, channel: 6, Mode: 54Mbps (802.11g) > save.
Step3: Connect to
AP2 through web browser > http://192.168.1.1 > enter
> username: admin, password: admin > ok.
Step4: Wireless
tab > Basic settings > SSID: ccna, Region: Afghanistan, Channel: 1, Mode:
54Mbps (802.11g) > save. Now connect PCs to AP.

Note: on roaming cause we must overlapping 20%, and SSID and
password of both AP wil be same and channels will be different.
Channels 1,3,6,7,11 are none overlapping channels. 1,6,11
channels are free channels.
Lab5_Configuring
AP as DHCP Server:
Step1: Connect to
AP > DHCP > Enable, give start IP, end IP, and reserved > save >
manual reboot > System tools > Reboot > ok.
Note: In LAN we give IP time 7 days (optional), but in
wireless network we mention as 8 hours (optional).
Lab6_Wireless
station isolation:
We enable wireless station isolation/AP isolation, where
students and visitors are resides.
AP isolation restricts WLAN station from accessing each other
through WLAN.
Step1: Connect to
AP > Wireless settings tab > check Enable AP isolation > save > ok.
Now ping between clients it will not access each other.

Lab7_Mac
Filtering:
Using Mac filtering, we can
restrict unauthorized users/machines form connecting to the WLAN. AP
operates at the data link layer and physical layer, so it can filter based on
physical/Mac address.
Step1: Connect to
AP > Wireless tab > wireless mac filtering > select Deny the stations
not spesified by any enabled entries in the list to access > click on Enable
> Ad new > give here Mac address of PCs that you want to allow > save
> ok.
Lab8_Wireless
Bridge mode (Point to Point):
Step1: Connect to
AP1 using web browser > wireless tab > wireless mode > select Bridge
(Point to Point), Now click on survey button to scan all Access points Mac
address, on survey page select AP2 Mac address and connect or give manually AP2
Mac address > save.
Step2: Connect to
AP2 using web browser > Wireless tab > wireless mode > select Bridge
(Point to Point), Now give Mac of AP1 > save.
Note: In this
case SSID and channel will be same. If we want to connect users then we select
Bridge+AP mode.

Lab9_Wireless
Bridge mode (Point to Multipoint):
Step1: Configure
Point to Multipoint Bridge > connect to AP1 (Point to Multipoint Bridge)
> wireless > wireless mode > Bridge (Point to Multipoint), here
mention other two AP’s Mac addresses
> next > save > ok.
Step2: Connect to
AP2 (Point to Point Bridge) > wireless > wireless mode > select Bridge
(Point to Point), here give AP1 Mac address > save > ok.
Step3: Connect to
AP3 (Point to Point Bridge) > wireless > wireless mode > select Bridge
(Point to Point), here give AP1 Mac address > save > ok.

Lab10_Repeater
Mode:
Repeater receives a wireless signal, regenrates the signal
and then send it forward destination network.
Step1: Configure
AP1 in Root mode > connect to the AP1 > wireless > wireless mode >
select Access Point, Enable SSID broadcast > save > ok.
Step2: configure
AP2 as Repeater > Connect to AP2 > wireless > wireless mode >
select Repeater, give Mac address of AP1 > save > ok.
Wireles network:

Lab11_External
Access Point (CPE):
CPE is use for external WLAN installation. Ex: In campus
network.
Step1: Connect to
E.AP (default IP 192.168.1.254, username: admin, password: admin) > network
> give IP, subnet mask, gateway > save. > wireless tab > Basic
setting > SSID: IT-Switcher, Region: pakistan, channel: 6, power: 27DBm Max
(600m), or 24, 21, 18, 15 it is Radiation power > Mode: 54Mbps (802.11g)
> save.
Wireless tab > wireless mode > Access point > save.
Lab12_E.AP
Repeater mode:
Step1: Connect to
E.AP > wireless > wireless mode > Repeater, give Mac address of AP
> save.
Step2: Connect to
AP > wireless > wireless mode > Access Point, Mac of E.AP(repeater)
> save.
Lab13_E.AP+DHCP
Server:
Step1: Connect to
AP > advance setting > DHCP > Enable, static, end IP, address lease
time, gateway, DNS > save > reboot (to reboot go to tools > reboot
> reboot > ok.
Wireless CPE modes
AP Client router, AP router, AP.
Lab14_Configuring
external CPE as a WISP client router:
Step1: Connect to
the External CPE through web browser > username and password > Quick
setup > next > select AP client router > next > select PPPoE >
next > give username and password which are given by WISP > next >
finish. OR,
Quick setup > next > select AP client router > next
> Dynamic > next > SSID: Linkwisp (which are provided by wisp) >
next > finish. Now we assign dynamically IP, Username, and Password. OR,
Quick setup > next > select AP client router > next
> Static > next > give IP, SSID, Username, and Password which are
given by WISP > next > finish.

Lab15_Configuring
External CPE as AP Router:
Step1: Connect to
E.AP through web browser > Quick setup > next > select AP Router >
next > select PPPoE > next > give username and password (which are
given by WISP) > next > SSID, Region , Channel, Mode, (For LAN) > next
> finish.

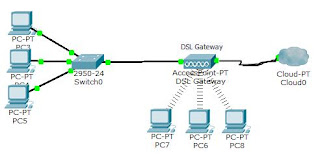
Wireless
Gateway (DSL):
A Gateway for router is a network device which allows
communication of packets between networks. This is a difference between a
gateway of router.
Gateway operates at all layer of OSI models, Router operates
on Physical, Datalink, and Network layers.
Lab16_Configuring
wireless gateway for Internet access:
Step1: Configure Internet settings (Ips settings).
Step2: Configure LAN IP settings.
Step3: Configuring DHCP for LAN clients.
Step4: Configuring SSID (WLAN) for WLAN settings.
Step1: Configure
Internet settings (IP settings) > Connect to e1000 gateway through web
browser > http://192.168.1.1 > enter
> username and password > Setup > Basic setup > select Static IP,
Internet IP, Gateway (DSL) > next > Network setup (LAN) > IP address:
172.16.10.1 > save > ok. Note: In LAN now we give static IP to PCs.
Step2: Configure
DHCP > DHCP server > Enable > give start and end IP, client lease time
(120) minuts > save.
Step3: Configure
WLAN for WLAN stations > Wireless tab > Configuration view, Manual >
network mode: Mixed, Network name (SSID): free-wlan, channel: 11, SSID: Enabled
> save > ok.

Lab17_Mac
filtering (Gateway):
Step1: Connect to
Gateway > Wireless tab > Wireless Mac filter > Enable > select
Permit PCs listed below to access the wireless network, (here we give Mac
addresses of PCs and these will be allowed other all will be denied) > save.
Lab18_Access
Restrictions (only in gateway and CISCO wireless routers):
Internet
Access restriction: is a limited level Firewall, allows to create Internet
access policies. Each policy can have a no of conditions:
- The list of computers to which the policy applies
- The schedule during which the policy is applicable (day+time restrictions)
- URLs either allowed or denied (www.facebook.com)
- Website either allowed or blocked based on regulas expression or keyword
- Blocked Applications
- Port or port range
Define Internet access policies, we have three policies: 1.
No Internet/network access, 2. Internet access, 3. Internet access for specific
group.
Step1: Connect to gateway
> Access Restrictions > Internet access policy > Access policy: 1,
Access restriction: Deny schedule: Everyday, applied
PCs: edit, here we give range of PCs to implement this policy, > save >
ok.
Step2: Connect to
Gateway > Access Restrictions > Internet access for all in break time:
access policy: 2, > access restrictions > access restriction : Allow,
schedule: Everyday, Time: 12PM to 02PM, website blocking by keyword: Keyword1:
Tube, Keyword2: adult > URL1: www.facebook.com, blocked
applications: select here applications that you want to block: Telnet, Ping,
FTP, etc > Apply PCs: Edit list, give here IP range which you want to apply
this policy > save > ok.
Step3: For
managers Internet access: access policy: 3, Access restriction > Access
Restriction: Allow: Everyday, Time: 8AM to 4PM, Enter policy name: Managers
> Eanabled, > save > ok.
Wireless Network Security
Two types
of Access Point:
- Simple Access point: in simple Access point we can’t block any URL or Key words
- Router Access point: in router Access point we can block any URL and key words
Wireless Print Server
Lab19_Configuring
wireless Print Server (Ad-hoc mode):
Step1: Connect to
the wireless Print server through wireless (in Ad-hoc) > click on wireless
icon adn select WLAN-PS > connect > ok.
Step2: Open
network and sharing center > click on wireless network connection > Properties
> Ipv4 > properties: 192.168.0.20 > ok. Now Ping to 192.168.0.10.
Step3: Connect to
the wireless Print server > Internet explorer > username, password >
Setup: system (form here we change name and user name password) > save and
restart.
Step4: Setup:
wireless > network type (Ad-hoc), SSID: WLAN, Channel: 11, Transmission
rate: Auto, wireless mode: B/G mixed > advanced settings: securityu tupe
> Wep > key index: 1, Encryption type: 64bit, key: 123, Authentication:
shared > save.
Installing Print
Server: Insert
Print server software CD to CDROM > run > click on wireless Print server
> setup wizard > next > select wireless print server > next >
Yes... > password of Print server > next > Communication type: Ad-hoc
> next > give security > next > give IP > next
> next > add new printer ( Printer drive) > add a local printer >
select Printer > next > next > finish.
Note: now we send jobs to Print server on which Printer
driver and software of Print server installed. If we want to send jobs from
other clients direct, then we must install Printer driver and Print server
software.
Note2: if we want to install Printer in infrastructure mode,
then we must connect Print server with access Pointy.
Lab20_Configuring
wireless Print server in infrastructure mode:
Step1: Install
Printer driver on the Print server.
Step2: Configure
the wireless Print server > connect to WLAN Print server using web browser
> http://192.168.0.10 > user:
admin, password: 123@qwe > setup, wireless > network type:
Infrastructure, Channel: 1, SSID: CCNA, > save. (channel and SSID of AP).
Step3: Print
server > run the software CD > select wireless Printer > next >
........ > finish.

End...
No comments:
Post a Comment